Paypal
If you want Kartra to process payments through your PayPal account*, you will need to integrate both platforms, and grant Kartra some permissions so it can initiate, cancel and refund transactions on your behalf.
* As per PayPal’s policies, Personal PayPal accounts cannot be used as payment gateways. You will need a Business or a Premier account.
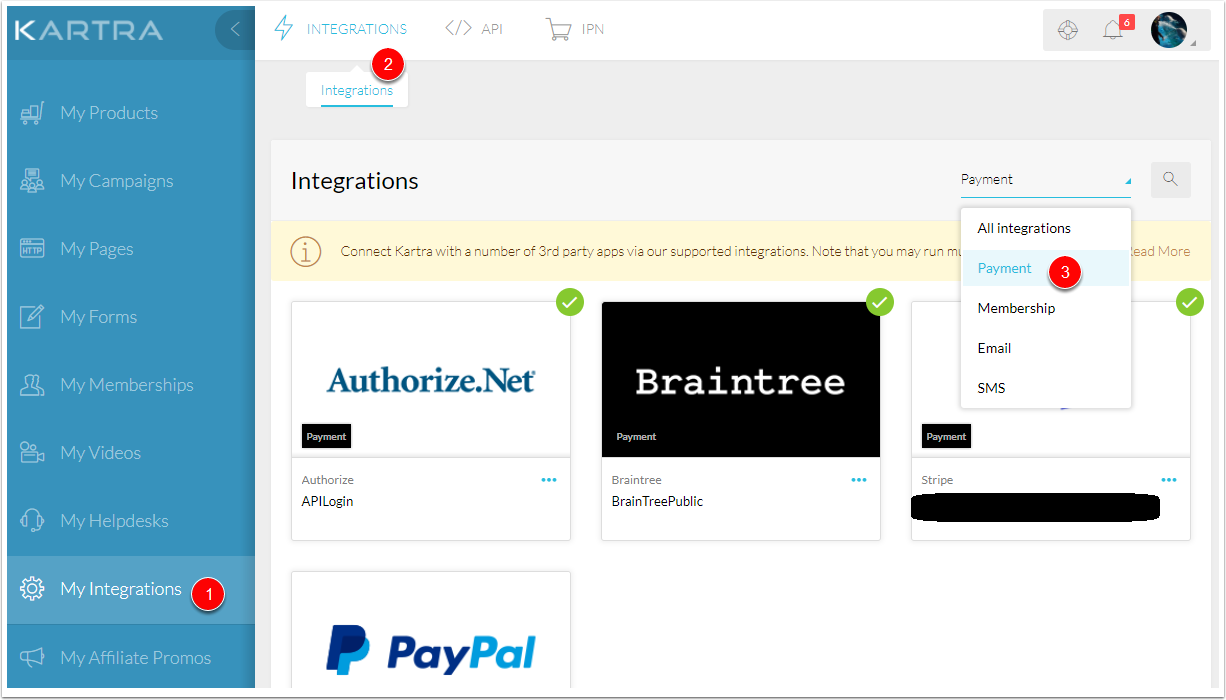
In order to Integrate PayPal, you will want to click My Integrations (Marked #1 Below) on the sidebar. Then you should be taken to Integrations. If not click Integrations (Marked #2 Below) in the top menu.
To make things just a bit easier, in the drop down box and choose “Payment” (Marked #3 Below). This will display only the four payment gateway integrations.
NOTE: You will see a green checkmark next to any integrations you have already set up.
Each of the Payment Gateways has their own little box. You want to click the three dots (marked #1 Below) under the “PayPal” logo.
This will pull up a black menu that will look similar to below. You want to press “New Integration” (Marked #2 Below). This will open a new popup, as displayed below.
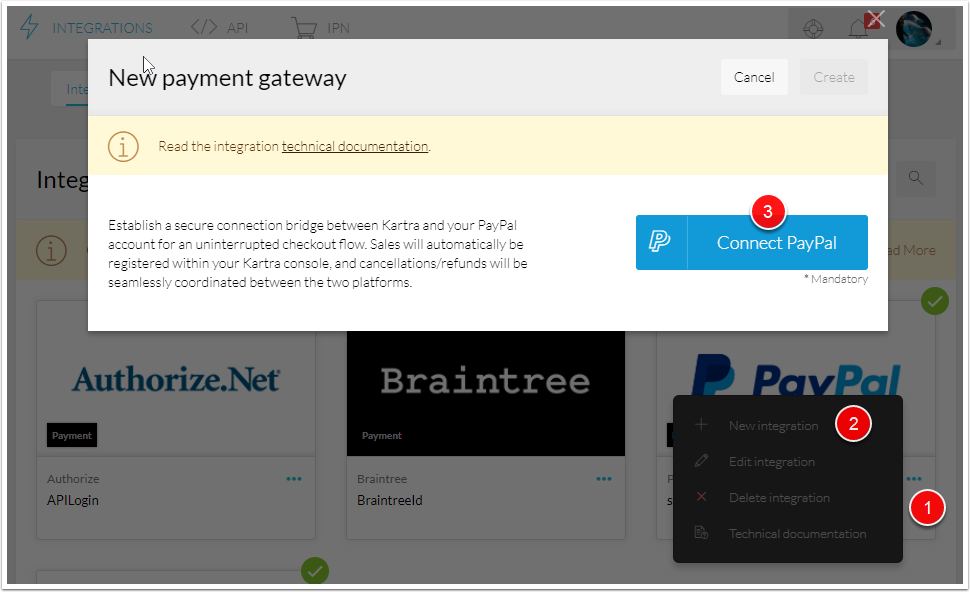
Press the Connect Button (Marked #3 Above). Log into PayPal at the prompt. Be sure you are logged into your business account.
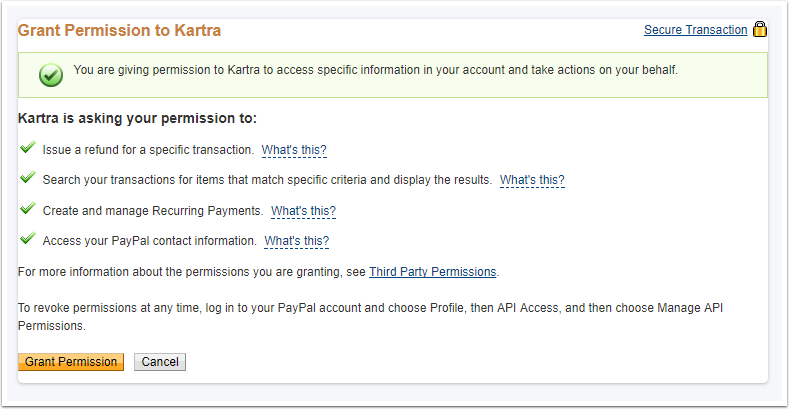
Next, you’ll see a screen similar to below. PayPal is advising you that “You are giving permission to Kartra to access specific information in your account and take actions on your behalf” which is correct and necessary to receive money. This connects your PayPal to Kartra
NOTE: If you see “Only Business or Premier Accounts can grant this permission”, it means that you’re probably running a Personal PayPal account which, as stated above, is not eligible to function as a payment gateway.
This popup should close and take you back to Kartra. And the Kartra Integration will ask for your PayPal PDT Token.
However; you will need to now login to PayPal to get your next piece of information, the PayPal PDT Token.
What is the PayPal PDT Token?
*Note that PDT Tokens are only available for Business accounts. Therefore, a Paypal Business account (as opposed to Personal) is required for the Kartra Integration.
The PDT Token is a Payment Data Transfer. This is PayPal’s secure method of transferring customer purchase data securely back to Kartra so you have a record of the transaction. Kartra needs an active PDT Token in order to be able to securely redirect your customers back to your desired Thank You page upon completing their payment in PayPal.
To configure your PDT Token, log in to your PayPal account and…
-
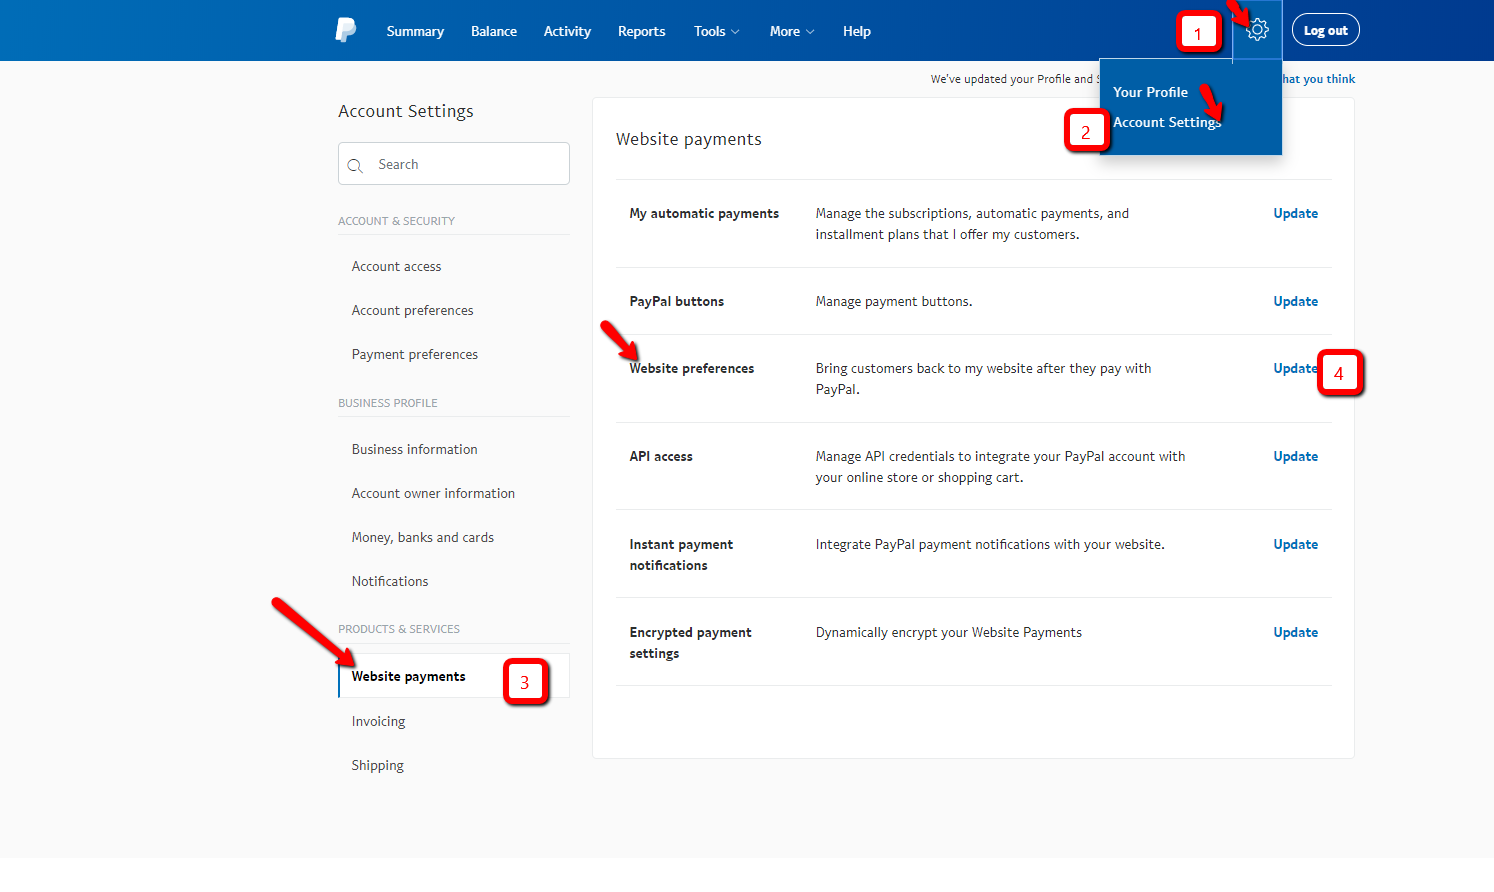
Click the gear icon in the top right (Marked as #1 below) of the PayPal dashboard and choose Account Settings (Marked as #2 below).
-
Click Website payments under “Products & Services” on the left of the page. (Marked as #3 below)
-
Click Update beside Website preferences. (Marked as #4 below)
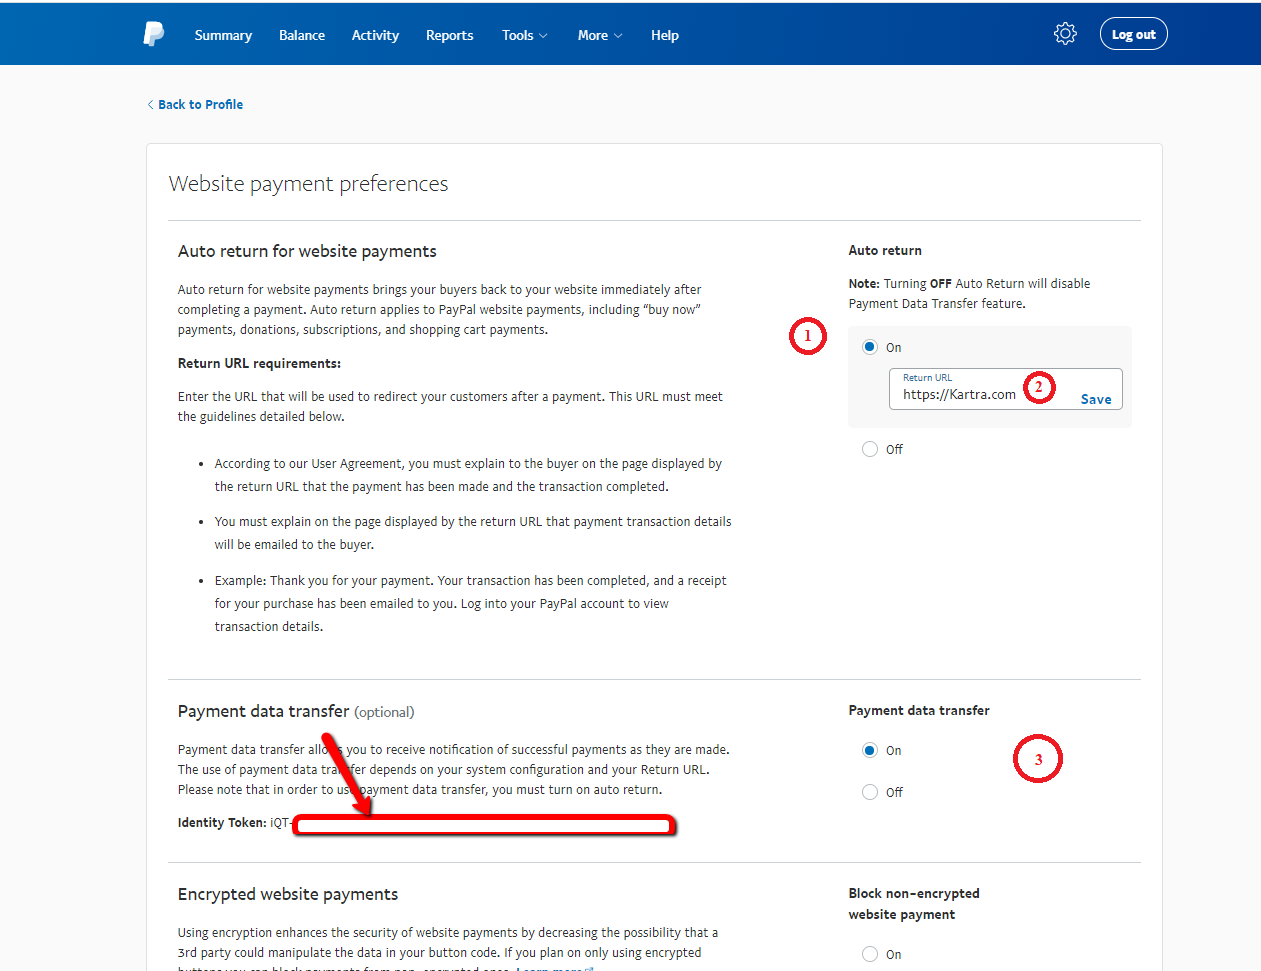
On the Screen that follows, turn on “Auto Return for Website Payments” (Marked #1 Below)
For Return URL, you may enter https://Kartra.com (Marked #2 Below), or indeed any URL you want. You see, Kartra will not actually read the Return URL from this field. Instead, you’ll in fact configure the redirect URL from within the Product Configuration area inside your Kartra account, and that’s the one Kartra will redirect to upon a successful payment.
Turn ON “Payment Data Transfer” (Marked #3 Below). Your PDT token may not appear until you have saved the page.
Scroll all the way to the bottom and press save.
This will take you back to your Business Profile Settings. Now, once again you have to navigate your way back to My Selling Tools, and from there to Website Preferences (just like before).
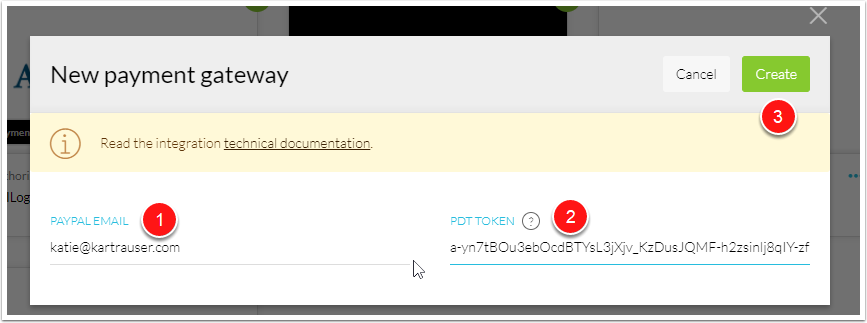
Under “Payment Data Transfer”, you will now see the long Identity Token (see “3” in screenshot above).
Go Back to Kartra. Paste that Identity Token in the PDT Token field (see “2” below).
Now the “CREATE” Button should be green, click it to save your Payment Gateway.
Your payment gateway should now be finally setup! However, there’s one last thing to do inside your PayPal account…
The Instant Payment Notification
There is one more thing that needs to be checked in order to make sure everything is working smoothly: we need to configure an Instant Payment Notification.
We need to make sure that your IPN notifications are turned ON. This is needed for Kartra to be able to track refunds, recurring payments and any of the other many notifications PayPal sends out in the background.
Let’s follow these steps:
-
Click the gear icon in the top right of the PayPal dashboard and choose Account Settings.
-
Click Notifications under “Business Profile” on the left of the page.
-
Click Update beside Instant payment notifications. See screenshot below:

-
Click Choose IPN Settings
-
Enter http://kartra.com in the Notification URL field.
-
Select Receive IPN messages (Enabled) and click Save.

If your IPN notifications page looks like the screenshot bellow, you do not need to do anything else. The Notification URL might be different but don’t worry, that bit is not important. What really matters is that the Message Delivery is Enabled.

In the other hand, if the Message Delivery is Disabled, or if the page shows like the screenshot bellow, then please click on “Choose IPN Settings”.

In the next page, at the Notification URL input field, type “https://kartra.com“. Make sure the Receive IPN Messages radio button is ticked ON, and then click Save.
Now your IPN should be enabled, and the PayPal integration is finally complete!