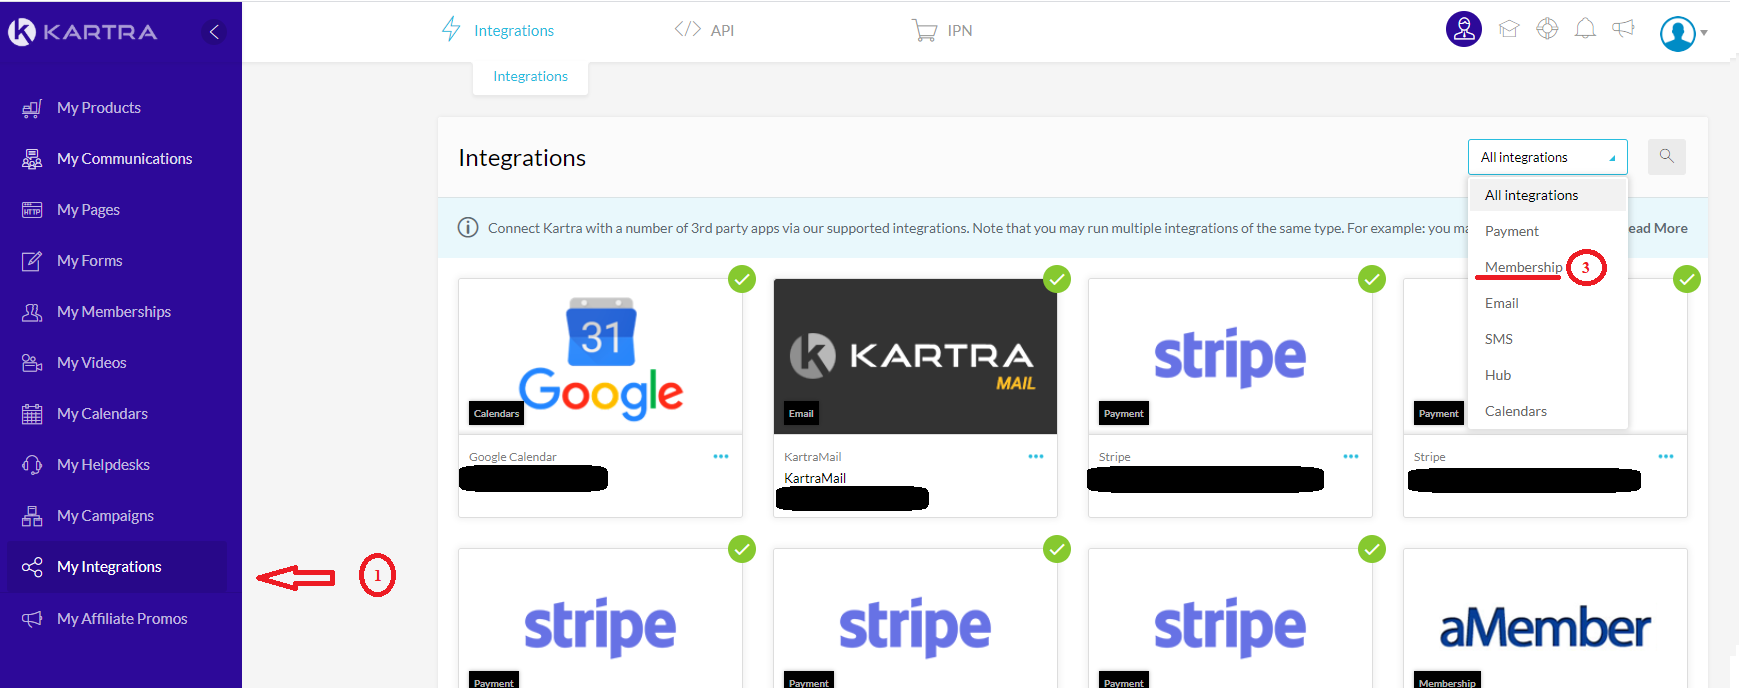
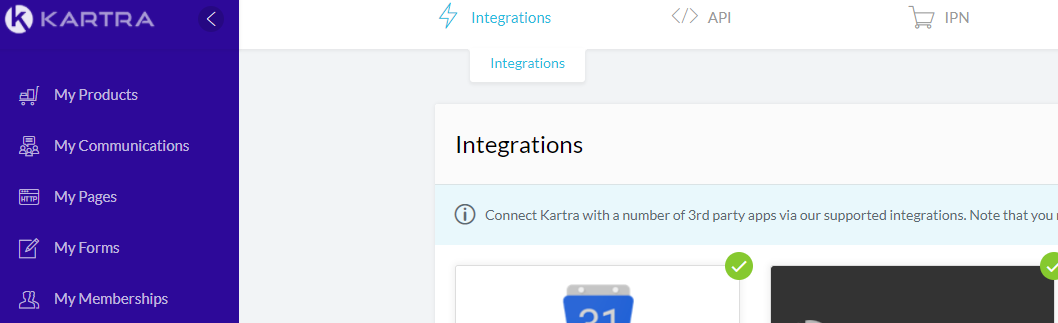
These Integrations are available by going to “My Integrations” on the sidebar (Marked #1 Below), you may need to click “Integrations” from the top menu as well.
There are a number of integrations available, but you can quickly sort out membership integrations by clicking “Membership” from the drop down (Marked #3 Below).
NOTE:Utilizing these gateways will involve a combination of using the specific service’s own API and the Kartra system. This will mean some services can be corrected in Kartra while others will need to be addressed on the other company’s end. This document will try to help clarify those differences.
IMPORTANT: Before we start, it’s important to note that the aMember integration will require the installation of the Kartra.php file in your aMember installation. You may download the Kartra.php file here: AMember Integration (This should include a Read_Me.txt and Kartra.php files). If you have questions about installing a plugin into your aMember account, please contact the aMember support and provide them the Kartra.php file from the zip file linked above.
When uploading the php file to your aMember directory, the directory should look like this:
* Note that the word “blog” in the URL path may be replaced with your aMember unique root path, but the rest of the URL should be exactly as displayed above.
Now that you have the Kartra plugin installed on your aMember, let’s proceed with the configuration!
You will need a Secret key (which can be any string of numbers and/or letters your wish), a URL to the membership portal provided by aMember, and the URL for the aMember notification integration. As well as the above information, Kartra will provide a connection key which will need to be used in the aMember products system.
Note: The rest of this documentation will assume you are an active user of the aMember service and know all the details of its own installation and use. Please contact your aMember support for more information on using the aMember service.
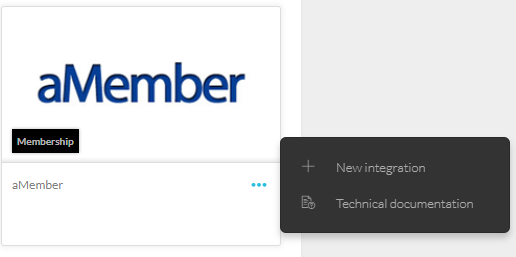
Upon selecting the aMember tab within the “my integrations” in Kartra you will be presented with the following.
Select the “+ New integration” option to create a new integration.
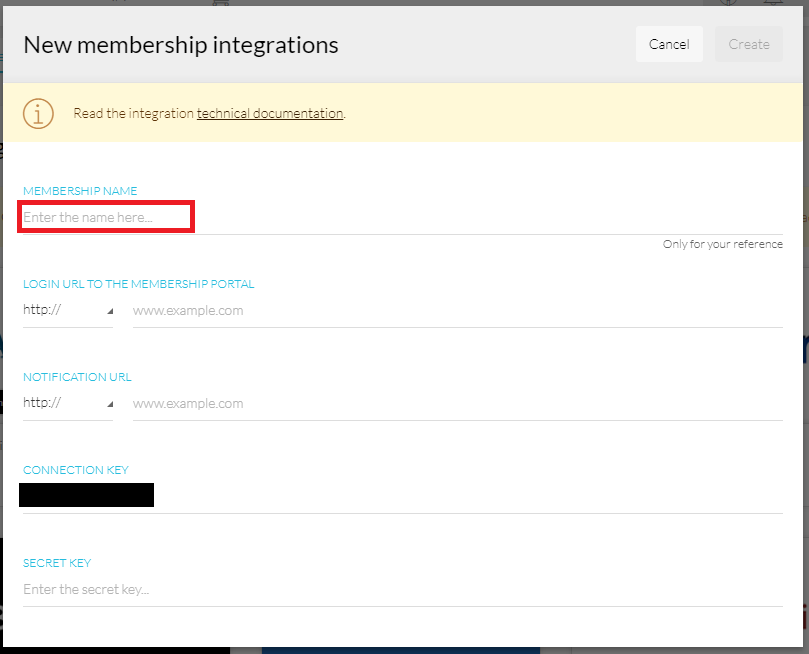
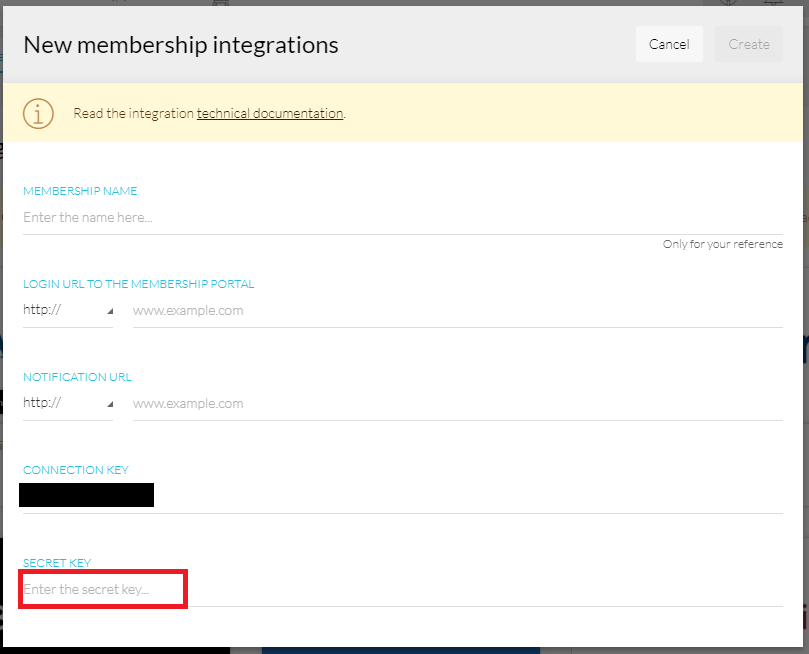
You will be presented with a “New membership integrations” modal window. You will need to create a name for your aMember integration, enter the name in the “MEMBERSHIP NAME” area on the window.
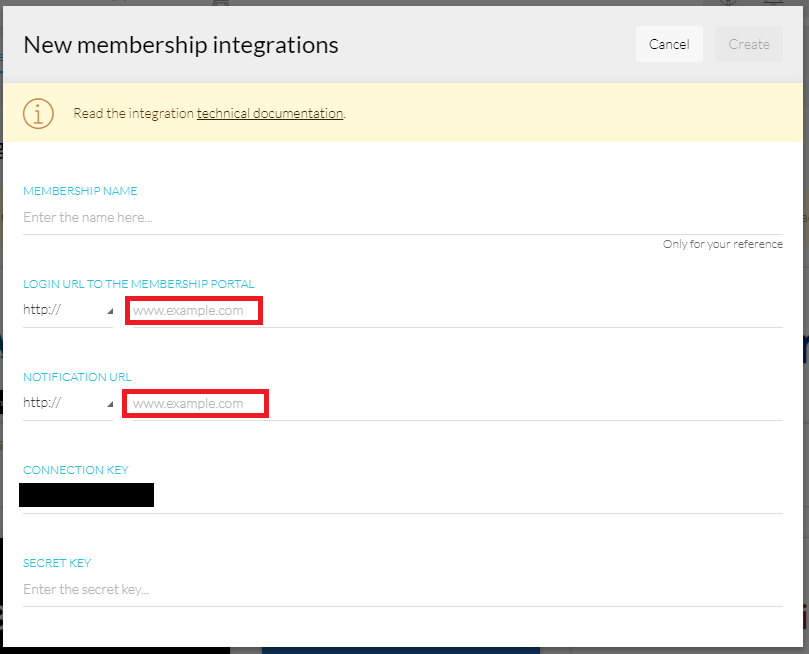
The membership portal URL will be the root login portal for your aMember.
The URL will look like the following: http://YOUR-aMember-URL.com/amember (replace YOUR-aMember-URL.com with your aMember site’s root URL)
The notification URL will be similar as it will be the following: https://YOUR-aMember-URL.com/amember/payment/kartra/ipn
Note: It is not shown in the image below, but you will need to change http: to https: in your notification URL.
The connection key will be provided to you upon creation of this integration and will be used with the products on your aMember site that you would like integrated with Kartra.
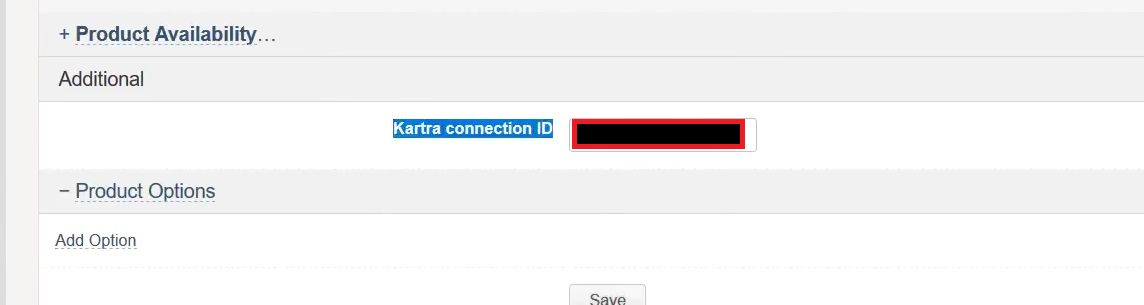
After you install the Kartra plugin on your aMember site, you should see the following appear on your product setup with aMember: (near the bottom of the setup)
This is where you place your “Connection Key” into aMember.
Finally, create a secret key in the location on the Kartra window as shown below: (Yes, you create this; please only use letters and/or numbers with no symbols or spaces)
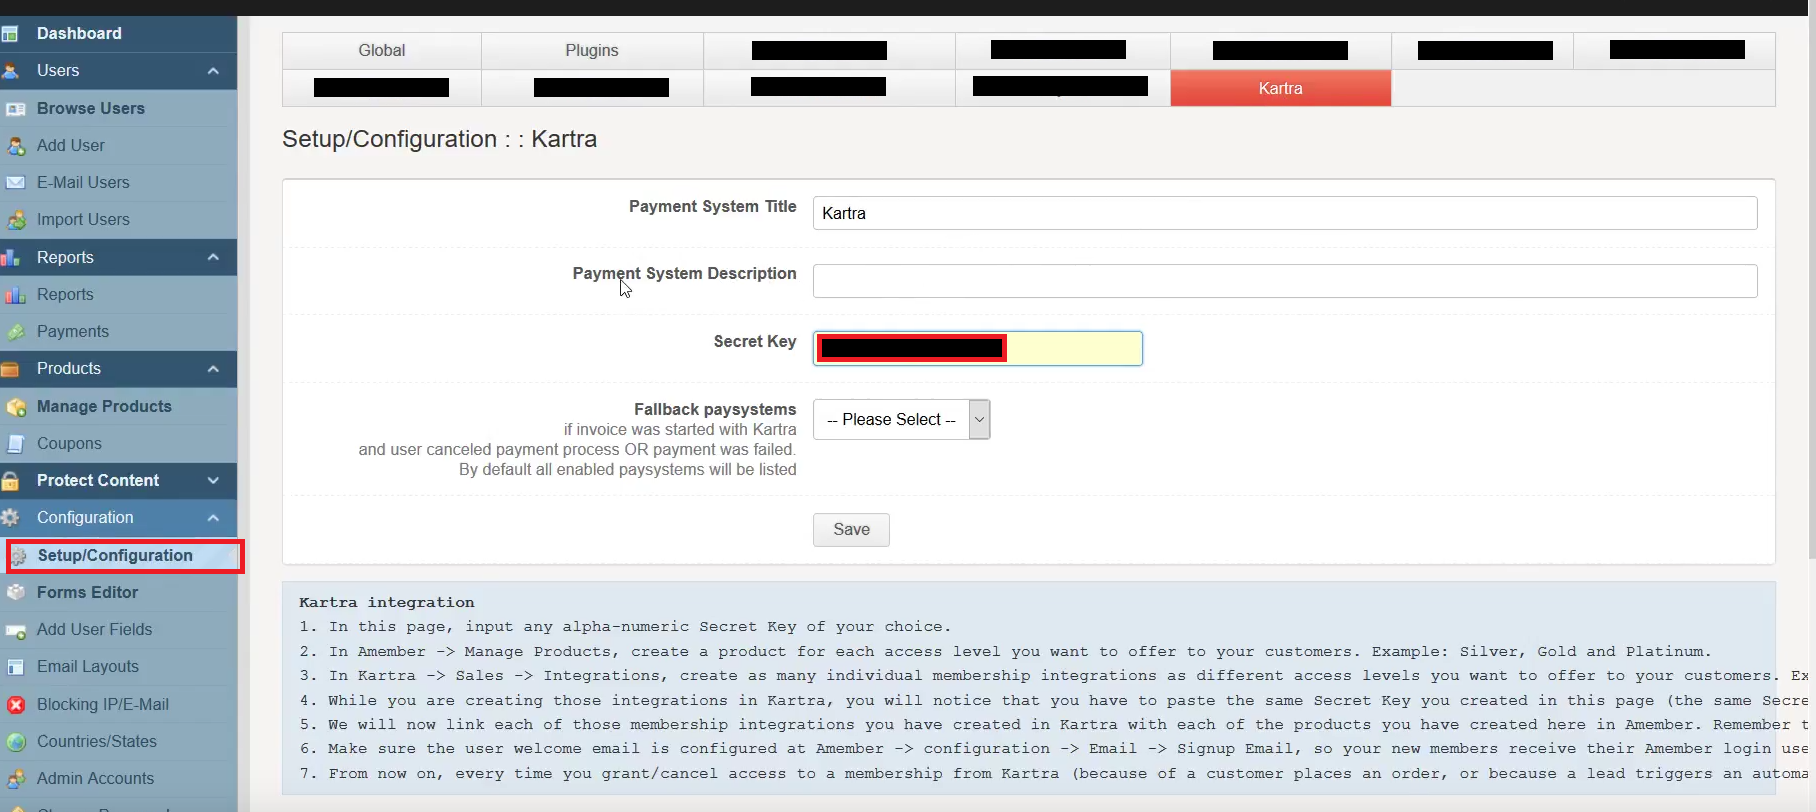
Inside aMember you will need to copy the secret key you created into the configuration for your Kartra plugin.
Place the secret key in the secret key section and update the other fields with the labels/info you desire.
Note: If you have not installed the Kartra.php file correctly you will not see this option in your setup/configuration.
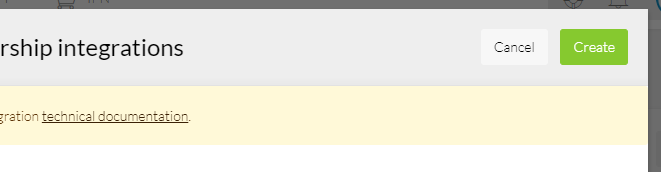
At this point with all options filled in, the create option will enabled in the Kartra integration. By selecting create you can now finish your aMember membership integration.
If your aMember integration does not work via Kartra, please contact Kartra support.
If you cannot install your Kartra plugin into aMember, please contact your aMember support and provide them the Kartra.php file located here: AMember Integration
BEFORE WE START… In order to create the communication bridge to Digital Access Pass (DAP), you need to download a small PHP file (make sure to unzip it!) and FTP-upload it into the folder where DAP is installed in your server.
For example, if you have installed DAP at YourDomain.com/DAP, then upload the file so its URL is YourDomain.com/DAP/dap-kartra.php
Once that PHP file is uploaded to your server, we can start the configuration process.
DAP membership integration into Kartra will require a Connection Key from Kartra, an Secret key from DAP, a URL to the membership portal provided by DAP, and the URL for the DAP Notification (which is the link to the PHP file you just uploaded. Example: YourDomain.com/DAP/dap-kartra.php)
Note: The rest of this documentation will assume you are an active user of the DAP service and know all the details of its own installation and use. Please contact your DAP support for more information on using the DAP service.
Upon selecting the DAP tab within the external membership integration window you will be presented with the following.
The membership portal URL is to be copied in to the membership portal location. The notification URL you collected from the installation of your DAP add-on and can be placed in the section dedicated to it in the Kartra integration setup. Normally this notification URL will be of a similar format to http://YOURSITE.com/dap/dap-kartra.php . Visit Configuration → XML Postback page and set the IPN URL to point to http://YOURSITE.com/dap/dap-kartra.php in most DAP setups, however this is not a guarantee and is dependent how you setup your DAP.
The Secret key can be collected from the configuration info window in DAP. Navigate to the left sidebar option “Digital Access Pass (DAP)” from your WordPress add-on. Select the “Setup” tab on the top bar; and then the “config” option within the “Setup” tab.
Scroll down through various options to get to the section shown below to collect your secret key.
Note: Kartra will use the same integration that DAP uses for other payment processing providers and may not be mentioned. However, it should work.
Also the DAP product/level can be taken from the “Products/Levels” tab on the top bar, and then take the name from the product list.
Once you have the secret key, place it in the section shown in the image below.
At this point with all options filled in, the create option will enabled. By selecting create you can now finish your DAP membership integration.
Note: Be sure and fill in a name for your membership integration.
If you are unable to find the “Secret Key” on DAP or have any other issues with collecting the information, please contact DAP support for help to navigate their website.
If your DAP Secret Key/information does not work via Kartra, please contact Kartra support.
Note: DAP is one of the more complex integration to use with Kartra and we would recommend most users use the Kartra membership service or be an advanced user of the DAP system.
Wishlist membership integration into Kartra will require an API key from Wishlist, a URL to the membership portal provided by Wishlist, and the URL for the Wishlist integration. If you have any trouble finding them, the folks at Wishlist support will point you in the right direction
The Integrations Section
These Integrations are available by going to “My Integrations” on the sidebar (Marked #1 Below), you may need to click “Integrations” from the top menu as well. There are a number of integrations available, but you can quickly sort out membership integrations by clicking “Membership” from the drop down (Marked #3 Below).
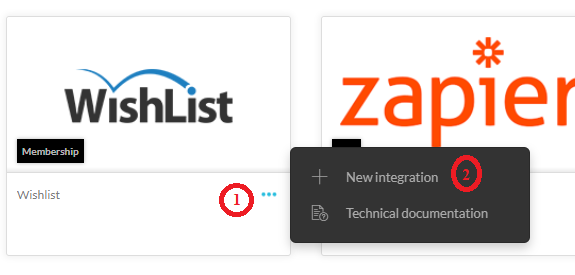
From the list of Membership Integrations, you will look for Wishlist. Click the dots icon (marked #1 Below) and select “New integration” (Marked #2 Below).
Getting Your Wishlist API Key
To collect your API Key: You will need to login to Wishlist on a separate tab and collect the key from the API options within Wishlist.
After logging into Wishlist, select the tabs in the following order: Settings -> Configuration -> Miscellaneous
NOTE: Wishlist may change their website from what appears in this document; but there should still be an API section with the key information. Scroll down the page until you reach the section where it displays your API key. See: Wishlist API Instructions
How Do I Connect Wishlist?
Now go back to Kartra.
First, you will want to give your Wishlist Membership level a name (Marked #1 Below). This is for your use only, but you will want something that is easy for you to recognize so you know which site and membership level this integration is.
Next you will need a URL, this is unique to each membership website and you need to use the link as they were setup via your Wishlist settings.
The “URL to Wishlist integration” (Marked #2 Below) will likely be where you as admin log into the website.
*Please Note: This may instead be the URL where your users of the Wishlist membership will need to login. This all depends on a variety of settings we do not manage on the Kartra end and may require some trial and error on your behalf to figure out which one will work with our system.
*Please Note:
Ensure you also set http:// or https:// depending on what your site is currently set to.
URL to WishList integration and is the root of your wishlist page, similar to “yoursite.com/admin/”. This does vary from user to user; please ensure it is your admin root on WordPress.
Now paste your Wishlist “API Key” into the integration window (Marked #3 Above). Press “Load Wishlist data” button (Marked # 4 Above) to load your Wishlist data into Kartra.
At this point the create button should be enabled (Marked #5 Above), press to finish your Wishlist membership integration. Congratulations, you are done!
*FINAL NOTES:
If your WishList integration is still not working, the most common issues tend to be typos with the URLs and missing ” / ” in the URLs as well.
If you are unable to find the “API Key” on Wishlist or have any other issues with collecting the API information, please contact Wishlist support.
If, upon double confirming your Wishlist credentials and verifying you’ve entered them in the correct fields, the integration still wouldn’t work, please contact Kartra support.
S2Member membership integration into Kartra will require an API key from S2Member, a URL to the membership portal provided by S2Member, and the URL for the S2Member integration, and a membership ID (level). You will need to create a separate integration per each membership level that you have set up. This will allow you to sell each level independently.
NOTE: This integration means most issues will need to be solved via S2 Member and S2Member support.
Kartra has the ability to integrate with a few different membership systems; aMember v4, DAP, OptimizePress 2, S2Member and Wishlist.
These Integrations are available by going to “My Integrations” on the sidebar, you may need to click “Integrations” from the top menu as well. There are a number of integrations available, but you can quickly sort out membership integrations by clicking “Membership” from the drop-down.
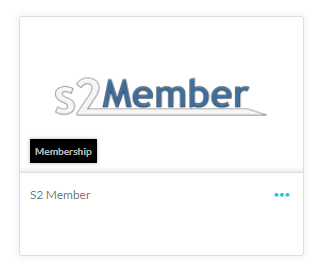
From the list of Membership Integrations, you will look for S2Member. Press the dots and you will be presented with a small popup, from it select “New integration”.
To collect your API Key: You will need to login to S2Member on a separate tab and collect the key from the API options within S2Member.
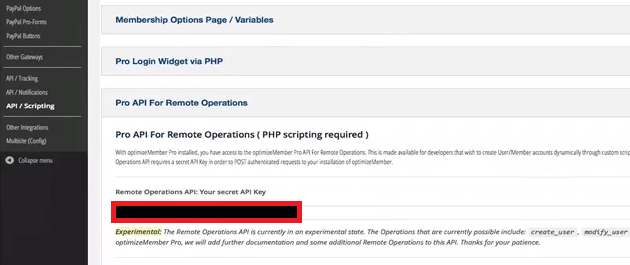
After logging into S2Member, select the tabs in the following order: S2Member add-on -> API / Scripting -> Pro API for remote operations.
NOTE: S2Member and/or WordPress may change their website from what appears in this document, but there should still be an API section with the key information. Copy the API key from the Pro API for remote operations tab. See: Instructions from S2Member on their API Key
Getting Your S2 Member ID
Because you will need an integration with each S2 Membership Level you have, you need to know which ID each level is.
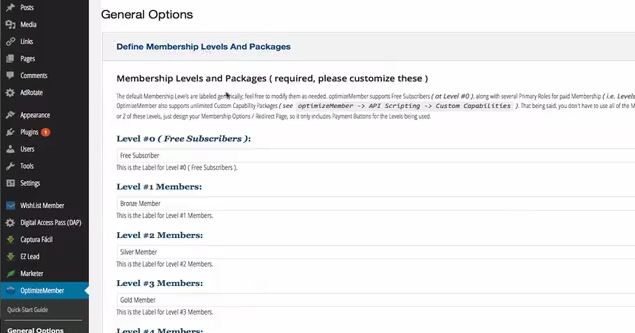
After logging into S2Member, select the tabs in the following order: S2Member add-on -> General Options -> Define Membership Levels and Packages.
NOTE: The S2Member add-on will not be labeled OptimizeMember. Example: If you want to use Level #0 (Free Subscribers) the membership ID will be 0. Level #1 will be 1.
Now go back to Kartra.
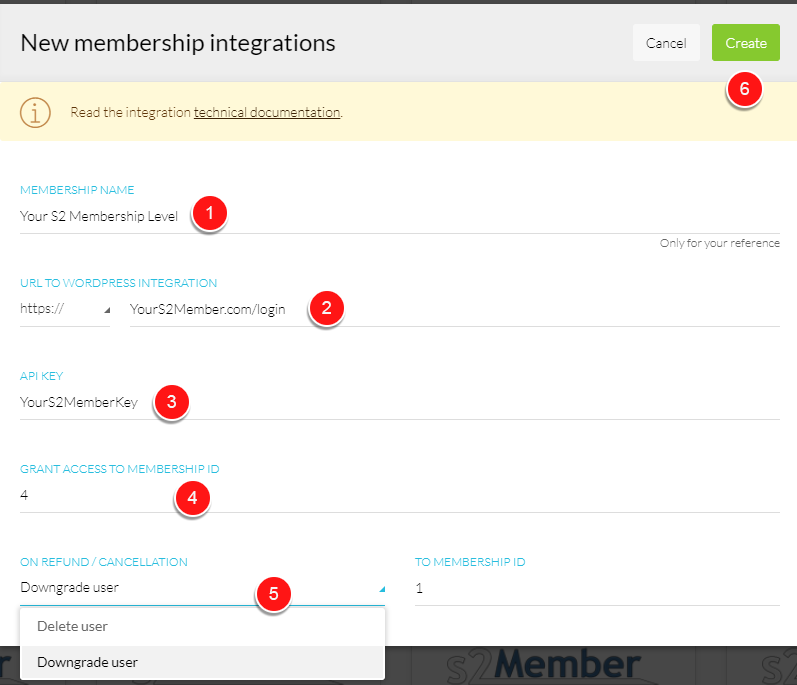
Membership Name First, you will want to give your S2 Membership level a name (Marked #1 Below). This is for your use only, but you will want something that is easy for you to recognize so you know which site and membership level this integration is.
Next, you will need two different URLs, these are unique to each membership website, and you need to use the links as they were set up via your S2 Member.
URL to WordPress integration The “URL to WordPress integration” will be the folder where your WordPress is Installed.
API KEY Now paste your S2 Member “API Key” into the integration window (Marked #3 Above).
Membership ID Since this integration will be specific to a predesignated Membership level, you will add that ID here (Marked #4 Above).
On Refund / Cancellation You will want to assign an action (Marked #5 Above) in the event the customer cancels/refunds the purchase. Deleting will delete the user. While Downgrade user will set the user to another membership ID of your choice.
At this point the create button should be enabled (Marked #6 Above), press to finish your Wishlist membership integration.
NOTE:
If you are unable to find the “API Key” on S2 Member or have any other issues with collecting the API information, please contact S2 Member support. If your S2 Member API Key does not work via Kartra, please contact Kartra support.
Integrating OptimizePress 2 into Kartra will require a three components from OptimizePress 2:
1. An API key
2. The URL for the OptimizePress 2 installation.
3. Membership ID: the Kartra/OptimizePress integration is specific to a single membership access level, so we recommend you to create a new integration for each access level you wish to add to your membership. As a result, each integration will require its unique membership ID from OptimizePress 2.
In Kartra, when you click the New Integration option for OptimizePress 2, you will see the following fields:
OptimizePress 2 is based on WordPress. As such, you need to enter the URL pointing to the exact place where WordPress has been installed in your domain. For example: http://yourdomain.com/wordpress/ or http://wordpress.yourdomain.com or whatever it might be. Copy that into the “URL to OptimizePress 2 integration” section.
Here’s how to collect your OptimizePress 2 API key:
At the Add-On section in your WordPress, select the following options: OptimizeMember -> API / Scripting -> Pro API for remote operations.
Note: OptimizePress 2 and/or WordPress may have change their interface by the time you read this documentation, but there should still be an API section with the key information.
From there, copy the API key from the Pro API for remote operations.
Once you have the API, go back to the original tab with Kartra, you will need to copy the “API Key” into the modal window.
Since this integration will be specific to a pre-designated Membership level, you will need to specify that Membership ID.
To find the Membership ID, go back to Add-Ons in your WordPress. First select “General Options” and then “Define Membership Levels and Packages”.
Example: If you want to use Level #0 (Free Subscribers) the membership ID will be 0. Level #1 will be Membership ID 1. And so on…
Final step: revoking access!
While a membership level is usually granted upon a purchase, it is also necessary to have a default action in case the customer cancels/refunds that very purchase. OptimizePress offers two options in this regard: delete or downgrade.
Deleting will, obviously, delete the user altogether. However, a downgrade will set the user to another membership ID of your choice.
And… that it’s! Just save your settings and the integration should be completed!
First of all, Kartra integrates with the New Kajabi, not the so-called Classic Kajabi, which is not supported anymore in terms of integrations with 3rd parties.
The Kajabi membership integration into Kartra will require an API Key, API Secret and Offer ID from Kajabi. You will all those credentials from within your Kajabi account. If you have any trouble finding them, the folks at Kajabi support will point you in the right direction.
The Integrations Section
These Integrations are available by going to “My Integrations” on the sidebar, you may need to click “Integrations” from the top menu as well. There are a number of integrations available, but you can quickly sort out membership integrations by clicking “Membership” from the drop down.
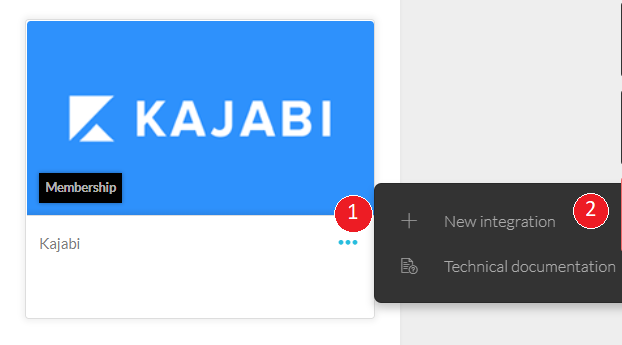
From the list of Membership Integrations, look for Kajabi. Click the dots icon (marked #1 Below) and select “New integration” (Marked #2 Below).
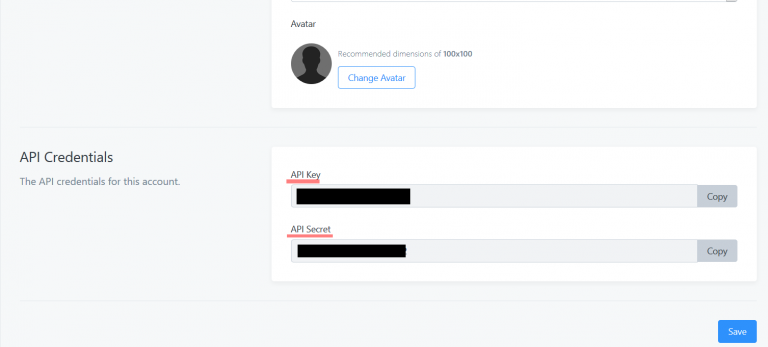
Getting Your Kajabi API Key and API Secret
To collect your API Key and API Secret: You will need to login to Kajabi on a separate tab and collect the key from the account details within Kajabi.
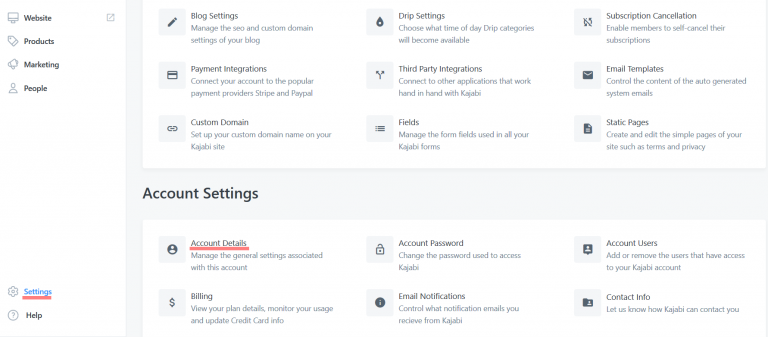
After logging into Kajabi, navigate in the following order: Settings -> Account Settings -> Account Details
NOTE: Kajabi may change their website from what appears in this document; but there should still be an API section with the information. Scroll down the page until you reach the section where it displays your API key and API Secret:
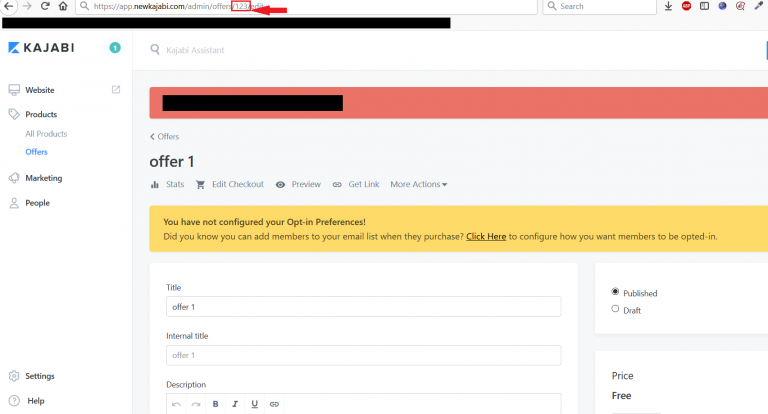
Getting Your Kajabi Offer ID
In the Kajabi account navigate in the following order: Products -> Offers and edit the desired offer:
After that, you can actually grab the Offer ID from the url :
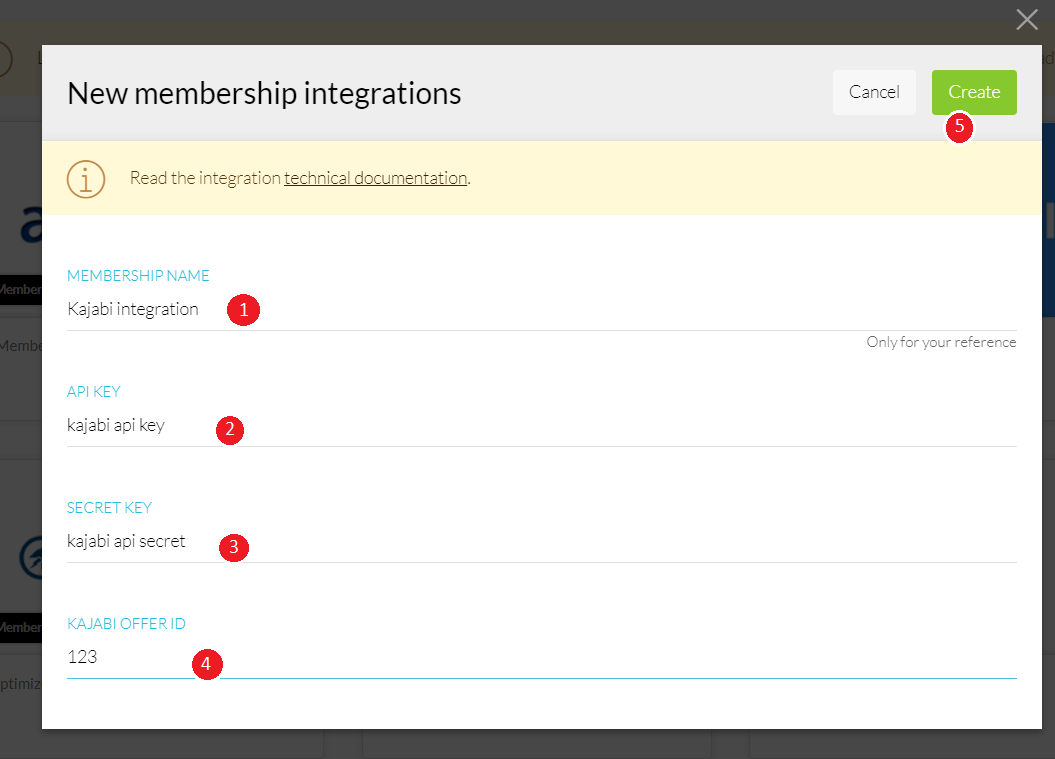
How Do I Connect To Kajabi?
Now that you have all your Kajabi credentials, go back to Kartra.
First, you will want to give your Kajabi Membership level a name (Marked #1 Below). This is for your use only, but you will want something that is easy for you to recognize so you know which site and membership level this integration is.
Now paste your Kajabi “API Key”, “API Seret” and “Offer ID” into the integration window (Marked #2, #3 and #4 respectively, above).
At this point the create button should be enabled (Marked #5 Above), press to finish your Kajabi membership integration. Congratulations, you’re done!
FINAL NOTES:
If you are unable to find the “API Key” and “API Secret” on Kajabi or have any other issues with collecting the API information, please contact Kajabi support.
If, upon double confirming your Kajabi credentials and verifying you’ve entered them in the correct fields, the integration still wouldn’t work, please contact Kartra support.