Kartra Documentation Technical Documentation for Kartra

Google Calendars

Integrating your Kartra Calendar and your Google Calendar will keep them both perfectly in sync:

  1. Instantly duplicate all scheduled appointments from your Kartra Calendar into your Google Calendar.
  2. Block out in your Kartra Calendar any appointment date/time you might reserve in your Google Calendar.

Image0

Creating the integration

The first thing is to connect your Google account and your Kartra account. Go to My Integrations (marked #1 Below) in the sidebar menu, and then to Integrations (marked #2 Below).

To make things just a bit easier, choose “Calendars” in the drop down (marked #3 Below).  You want to click the three dots (marked #4 Below) under the “Google” logo. Then, select “New Integration” (marked #5 Below).

Integration image

A new popup window will be opened. Go ahead and click on the Connect Google button (marked #1 below).

Image2

At this point, the system will prompt you to log into your Google account, and grant Kartra certain access permissions. This is necessary for Kartra to both write and read events from your Google Calendar.

Needless to say, Kartra will not be able to read any private information or email history from your Google account. Only the appointments in your Google Calendars will be accessible by Kartra.

Once the permissions are granted, the integration to your Google Calendar will be done!

Image3

Linking both calendars

Now that the connection between your Kartra account and your Google account is established, we need define which of your Kartra Calendars should link to which of your Google Calendars.

Go to the section My Calendars (marked #1 below), edit the specific Kartra calendar you want to connect to your Google Calendar, and go to the automation step in the configuration wizard (marked #2 below).

Edit the box and choose “Yes, sync with an external calendar” (marked #3 below).

Image4

Now, use the dropdowns to select the particular Google integration (marked #1 below) and the particular Google Calendar (marked #2 below) you want to integrate this particular class with, and save the step.

IMPORTANT: remember that you will be able to establish a different connection for each Class inside your Kartra Calendar. This is useful in case each Class is conducted by a different host/person, and thus allowing each of them to link their respective Class to their respective Google Calendar.

Image5

Your integration is finished! From now on, all the events created through your Kartra Calendar will appear in your Google Calendar. Furthermore, when an event is created directly in your Google Calendar, they will be blocked in your Kartra Calendar.

Zoom Meetings

Integrating your Kartra Calendar and your Zoom account will allow you to create zoom meetings for your Kartra Calendar events, instantly adding all scheduled appointments from your Kartra Calendar as meetings in your Zoom account.

*Please Note: You will have the ability to choose which calendars will use Zoom and which calendars will not.

Creating the integration

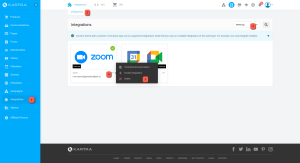
The first thing is to connect your Zoom account and your Kartra account. Go to Integrations (marked #1 Below) in the sidebar menu, and then to Integrations (marked #2 Below).

To make things just a bit easier, choose “Meetings” in the drop down (marked #3 Below).  You want to click the three dots (marked #4 Below) under the “Zoom” logo. Then, select “New Integration” (marked #5 Below).

*Please Note: A Zoom account is allowed to be linked only with one Kartra account. You will need to remove the integration to add your Zoom account to another Kartra account.

2023 04 06 14 01 50

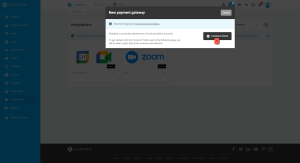
A new popup window will be opened. Go ahead and click on the Connect Zoom button (marked #1 below).

2023 04 06 14 02 55

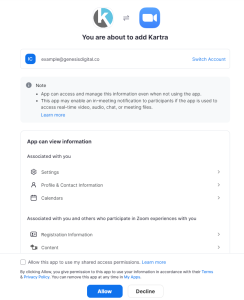
At this point, the system will prompt you to log into your Zoom account, and grant Kartra certain access permissions. This is necessary for Kartra to write meetings into your Zoom account.

Needless to say, Kartra will not be able to read any private information Zoom account. Only the meetings will be accessible by Kartra.

Once the permissions are granted, the integration to your Zoom account will be done!

2023 04 06 14 07 02

Linking the calendar to meetings

After the connection between your Kartra account and your Zoom account is established, we need to define which of your Kartra Calendars should link to your Zoom account.

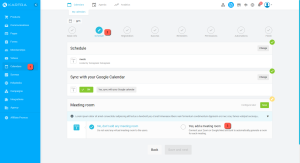
Go to the section Calendars (marked #1 below), edit the specific Kartra calendar you want to connect to your Zoom account, and go to the schedule step in the configuration wizard (marked #2 below).

Edit the box and choose “Yes, add a meeting room” (marked #3 below).

2023 04 06 14 30 21

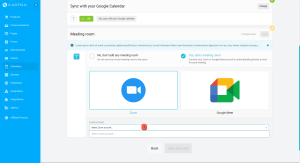
Use the drop-downs to select the particular Zoom integration (marked #1 below) you want to integrate this particular class with, and save the step.

*Please Note: remember that you will be able to establish a different connection for each Class inside your Kartra Calendar. This is useful in case each Class is conducted by a different host/person, and thus allowing each of them to link their respective Class to their respective Zoom account.

2023 04 06 13 57 23

Your integration is finished! From now on, all the events created through your Kartra Calendar will appear in your as meetings in your Zoom account.

Uninstalling The Zoom Integration

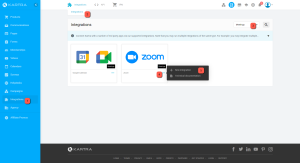
In order to delete an existing Zoom integration, go to My Integrations (marked #1 Below) in the sidebar menu, and then to Integrations (marked #2 Below).

Choose “Meetings” in the drop down (marked #3 Below).  You want to click the three dots (marked #4 Below) under the “Zoom” logo. Then, select “Delete” (marked #5 Below).

2023 04 06 14 15 22

Upon deleting the integration, all the meetings created by Kartra in your Zoom account linked to this integration will be deleted.

© 2024 Kartra All Rights Reserved